

How to Set and Wind a Rolex Datejust Correctly (Step-by-Step Guide)
A step-by-step guide explaining how to correctly set the time, date, and wind a Rolex Datejust without damaging the movement.

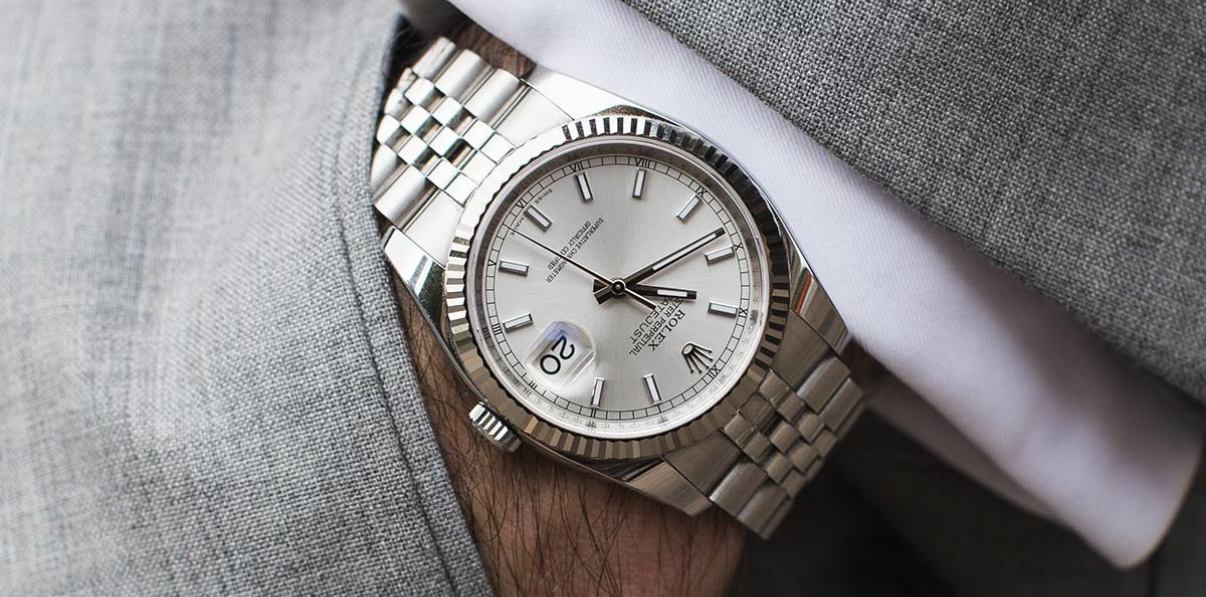
The Rolex Datejust is one of the most iconic automatic watches ever made. While it’s built to be robust, setting it incorrectly especially the date can damage the movement over time.
This guide explains the correct way to set the date, time, and wind a Rolex Datejust, step by step, so everything functions exactly as it should.
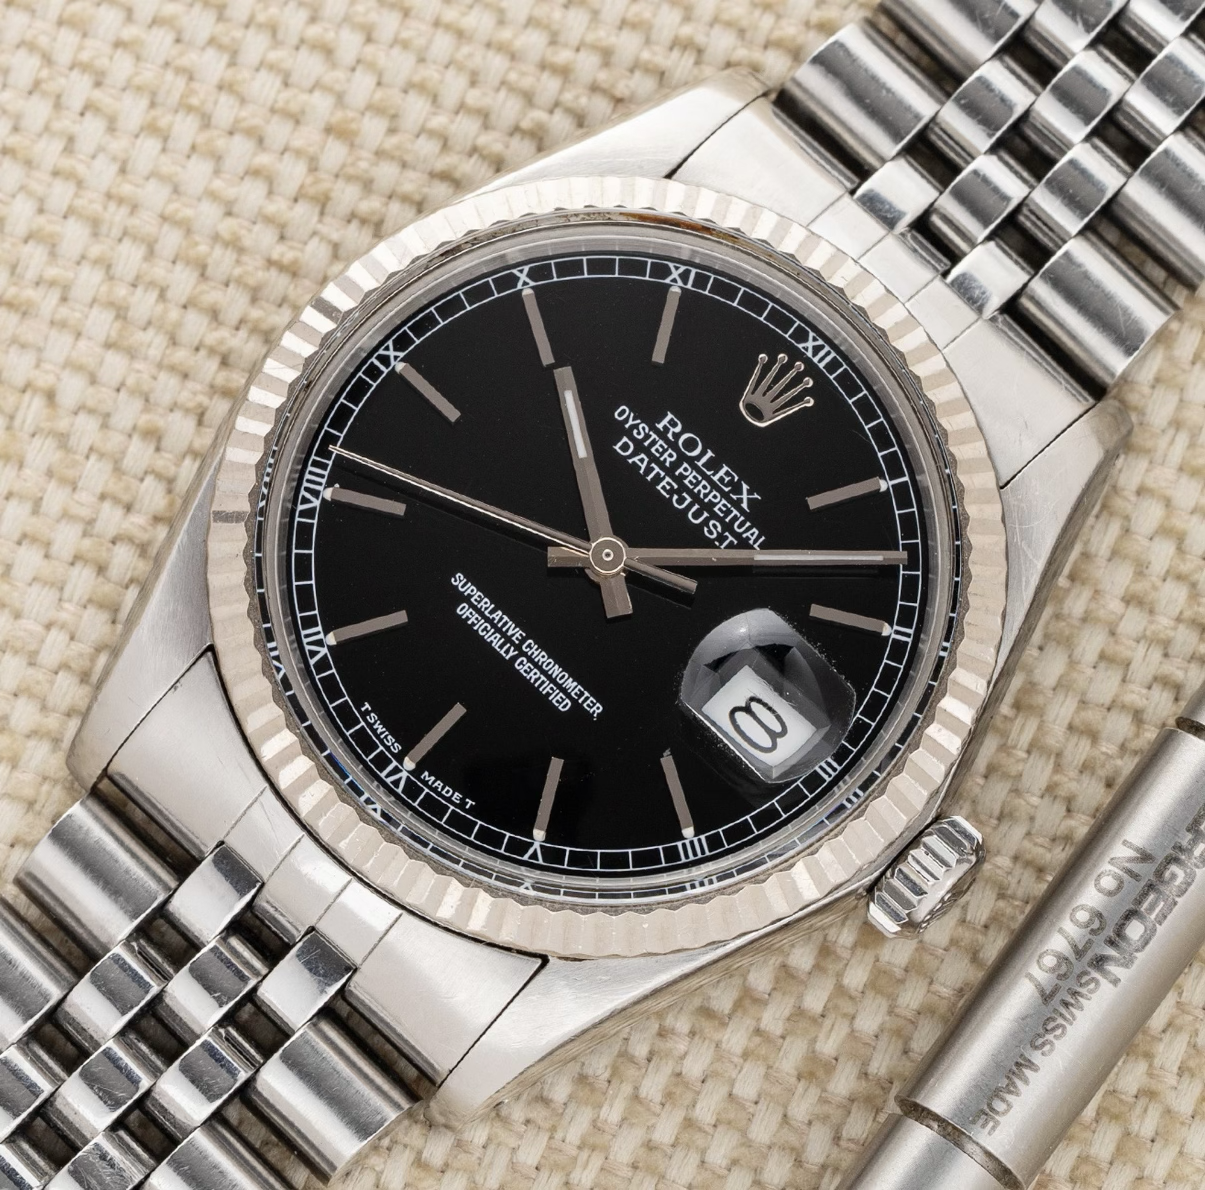
Understanding the Rolex Datejust Crown Positions
A Rolex Datejust crown has four distinct positions:
Position 1 – Screwed In
The normal position. The crown is fully screwed down and the watch is sealed and water-resistant.
Position 2 – Unscrewed (Winding Position)
The crown is unscrewed but not pulled out.
Used to manually wind the watch.
Position 3 – First Click Out (Date Setting)
Used to set the date only.
Position 4 – Second Click Out (Time Setting)
Used to set the time.
This position stops the seconds hand (hacking).
Step 1: Unscrew the Crown
Turn the crown anti-clockwise until it releases.
Once unscrewed, the crown will sit in Position 2 (winding position).
Do not pull or force the crown.
Step 2: Set the Date (Do This First)
From Position 2, gently pull the crown out one click to Position 3.
Then:
Rotate the crown to advance the date
Stop once the correct date appears
Do not do this if the time is between 9:00 PM and 3:00 AM
⚠️ During this time window, the date mechanism is engaged. Changing the date can damage internal components.
Step 3: Set the Time
Once the date is correct:
Pull the crown out one more click to Position 4
Turn the hands clockwise only
Watch for the date to change, this confirms you’ve passed midnight
Continue setting the correct time, making sure AM or PM is correct
This ensures the date changes at the correct time each day.
Step 4: Wind the Watch
After setting the time:
Push the crown back in to Position 2
Turn the crown clockwise (towards 12 o’clock)
Wind approximately 5–10 turns
You’ll feel smooth resistance stop once the watch feels fully wound.
✅ Helps maintain accuracy
✅ Prevents the watch stopping
✅ Especially important if the watch hasn’t been worn recently
Step 5: Secure the Crown
Push the crown back in and screw it clockwise until it is snug.
Do not over tighten firm pressure is enough to maintain water resistance.
Common Mistakes to Avoid
Changing the date between 9pm and 3am
Pulling the crown without unscrewing it
Turning the hands backwards
Forgetting to wind the watch
Leaving the crown unscrewed
Most Date-just issues are caused by incorrect setting rather than wear.
Final Advice
The Rolex Date-just is built to last a lifetime, but correct handling is key. Taking a moment to follow the proper setting order protects the movement and keeps everything running exactly as intended.
If anything feels stiff or unusual, stop forcing a Rolex crown is never the answer.

How to Change the Time and Date on a Rolex GMT-Master II (Correct Method)
A step-by-step guide explaining how to correctly change the time and date on a Rolex GMT-Master II using the jumping hour hand.

The Rolex GMT-Master II is designed differently from most automatic watches.
Thanks to its independently adjustable hour hand, you can change the time and date safely without stopping the movement if it’s done correctly.
This guide explains exactly how to change both the time and the date, without damaging the watch.
Understanding the Rolex GMT-Master II
Unlike standard date watches, the GMT-Master II features:
⭐️ A jumping local hour hand
⭐️ A 24-hour GMT hand (home time)
⭐️ A date mechanism linked to the local hour hand
This means the date changes when the hour hand passes midnight, not via a traditional quickset.
Crown Positions Explained
The crown has three positions:
1. Screwed in – normal, water-tight
2. First click out – adjusts local hour hand & date
3. Second click out – adjusts all hands together
⚠️ There is no separate quickset date wheel like on a Submariner or Datejust.
How to Change Local Time (Travelling)
This is the most common adjustment.
Step-by-Step
1. Unscrew the crown (anti-clockwise)
2. Pull the crown to the first click
3. Rotate the crown to move the hour hand forward or backward
▪️ The minute and GMT hands stay still
▪️ Accuracy is not affected
4. Push the crown back in and screw it down
✅ Safe
✅ Does not stop the watch
✅ Designed for frequent use
How to Change the Date on a Rolex GMT-Master II
Unlike most watches, the date is changed by moving the hour hand, not by a separate date-set position.
Correct Method
1. Unscrew the crown
2. Pull the crown to the first click
3. Rotate the crown forward until the hour hand passes midnight
4. Each time the hour hand crosses midnight, the date advances by one day
5. Continue until the correct date is shown
6. Push the crown back in and screw it down
💡 You can move the hour hand forwards or backwards to reach the correct date faster.
Why This Is Safe (Important)
On a GMT-Master II:
⭐️ The date mechanism is disengaged during hour-hand adjustment
⭐️ There is no traditional “danger zone” like on standard date watches
⭐️ Rolex designed this system to be used at any time of day
That said:
✅ Always turn gently
✅ Never force resistance
How to Set Home Time (GMT Hand)
This is usually done once.
Steps
1. Unscrew the crown
2. Pull to the second click
3. Set:
▪️ Minute hand
▪️ GMT hand (points to 24-hour scale)
4. Push crown back in and screw down
Common Mistakes to Avoid
⭐️ Trying to “quickset” the date like a Submariner
⭐️ Using the second crown position for daily time changes
⭐️ Forgetting to screw the crown back down
⭐️ Forcing the crown when resistance is felt
Key Takeaways
✅ Date is changed via the jumping hour hand
✅ Use first crown position only
✅ No quickset date wheel
✅ Designed for frequent time-zone changes
Final Advice
The Rolex GMT-Master II is one of the most intelligently designed travel watches ever made.
Once you understand how the hour hand and date are linked, setting it becomes fast, safe, and intuitive.
